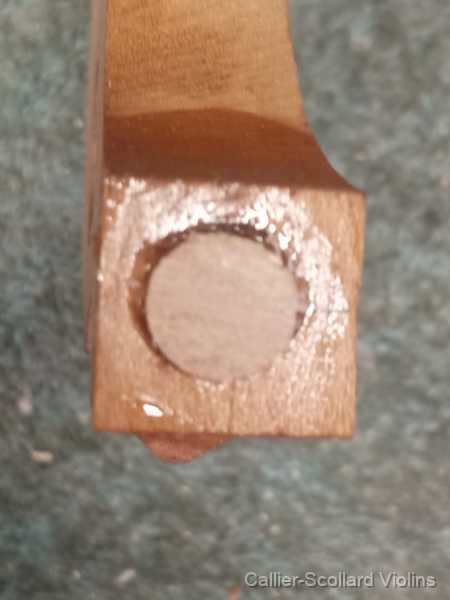
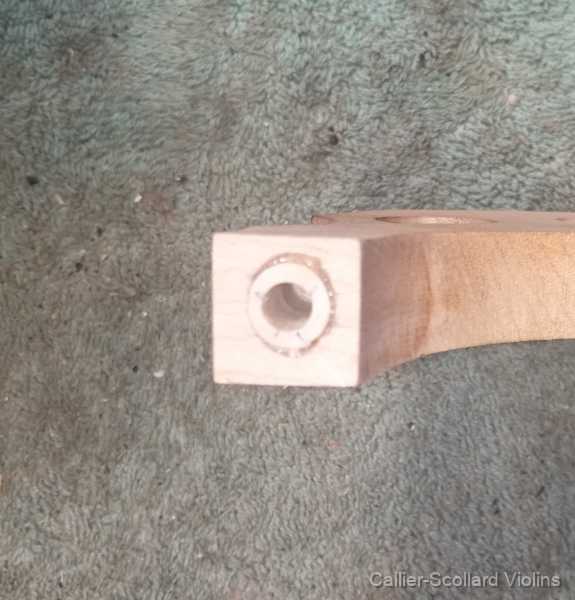
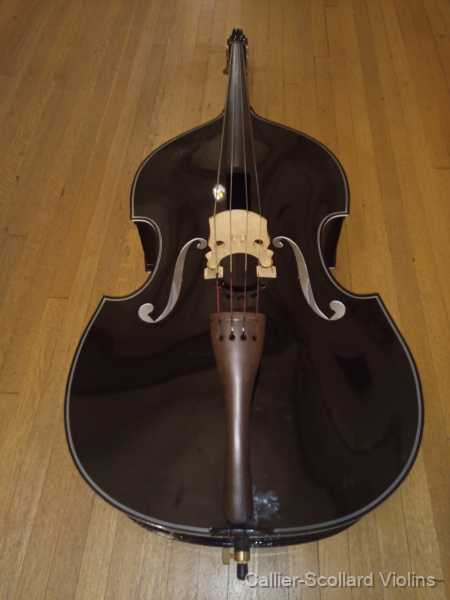
This bass bridge had a broken adjuster foot, with a crack running along the grain of the maple. Under pressure from the strings, the crack spread apart, allowing the foot to separate. I suspect the failure was caused by either an existing defect in the maple or an adjuster hole that was too tight, placing excessive stress on the wood as the bridge changed position. To repair the foot, I first glued the crack back together, then drilled a larger hole and fitted a maple dowel with its grain running at a 90-degree angle to the original wood for added strength. After leveling the surface, I drilled a new hole for the adjuster. Since the original adjuster holes were too tight, I also slightly enlarged the hole in the unbroken foot to prevent the same problem from occurring again. - Reglue the Crack: Carefully bring the cracked sections of the bass bridge foot back together and glue them securely.
- Drill the Foot: Drill a larger hole through the repaired area of the foot to accommodate a reinforcing dowel.
- Fit the Dowel: Carefully fit and glue the dowel into the hole, orienting its grain at a 90-degree angle to the original maple grain to strengthen the repair.
- Flatten the Surface: Trim the excess dowel material and level the surface of the foot, restoring a smooth, flat surface for the adjuster.
- Drill the Adjuster Hole: Carefully drill a new hole through the reinforced area, properly sizing it to accommodate the bridge adjuster.
- Adjust the Opposite Foot: Since the original adjuster holes were too tight on both sides, slightly enlarge the hole in the unbroken foot to allow the adjuster to fit properly without placing excessive pressure on the maple.
 IMG 20260929 102324 149 | IMG 20261121 131615 300 | IMG 20261121 134205 076 |
Note: The customer originally wanted a new bridge and adjusters fitted, but since this was a relatively inexpensive instrument, I considered three possible approaches: fitting a completely new bridge and adjusters, finding a suitable foot from an older bridge and modifying it to match the height and shape of the original, or repairing the existing foot by gluing the crack and bushing the adjuster hole. Since repairing the original foot was the simplest and most economical solution, that was the approach I chose. I didn't photograph the clamping process because it was fairly straightforward. In this case, I worked clear epoxy into the crack and clamped the foot together. Once the crack was repaired, I fitted and glued the reinforcing dowel with epoxy, then drilled a new hole for the adjuster. Drilling the Adjuster Holes: I use a small drilling jig that I made specifically for fitting bass bridge adjusters. Once the drilling angles are established, the fixture slides horizontally to position the second hole without changing the original settings. This allows both adjuster holes to be drilled at matching angles, helping ensure proper alignment and reducing unnecessary stress on the bridge feet. |